Register Your Organization
To start using Acalumi, register your organization at acalumi.com/onboard. Registration is a 3-step process.
Step 1: Organization Details
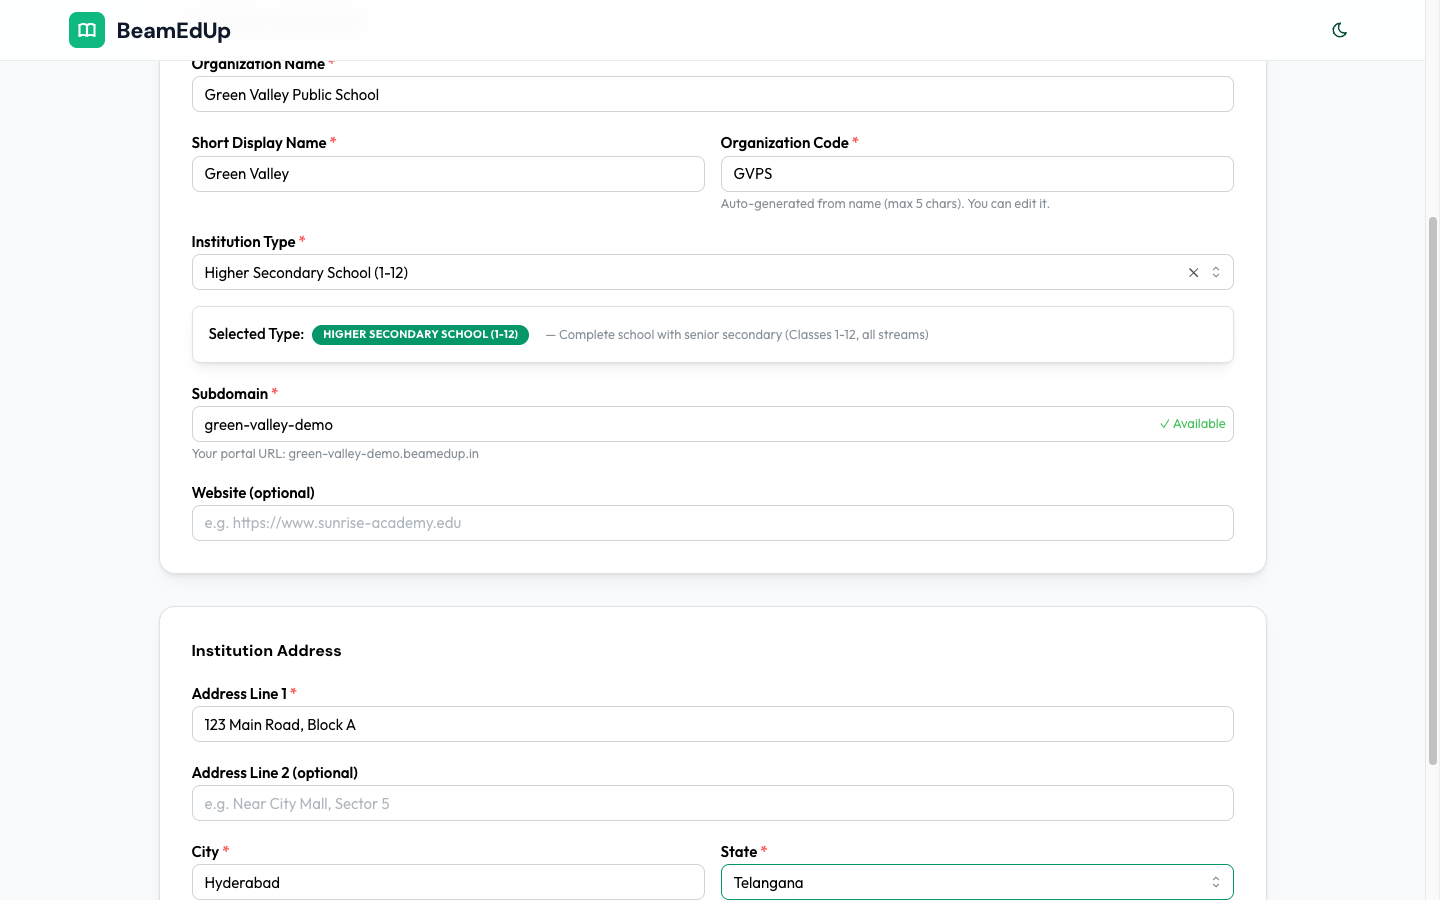
Fill in your organization information in two sections.
Institution Information
| Field | Required | Description |
|---|---|---|
| Organization Name | Yes | Your full institution name (e.g., "Green Valley Public School") |
| Short Display Name | Yes | An abbreviated name shown in the sidebar and badges (e.g., "Green Valley") |
| Organization Code | Yes | A short unique code (max 5 chars), auto-generated from the name — you can edit it (e.g., "GVPS") |
| Institution Type | Yes | Select your institution type (e.g., School, College, Coaching Center, University, Training Institute) |
| Subdomain | Yes | Your unique portal URL — becomes your-subdomain.acalumi.com (e.g., green-valley.acalumi.com) |
| Website | No | Your institution's website URL |
Institution Address
| Field | Required | Description |
|---|---|---|
| Address Line 1 | Yes | Street address (e.g., "123 Main Road, Block A") |
| Address Line 2 | No | Additional address details (e.g., "Near City Mall, Sector 5") |
| City | Yes | City where your institution is located |
| State | Yes | Select your state from the dropdown |
| PIN Code | Yes | Your postal code (e.g., "500001") |
| Country | Yes | Locked to India |
Note: Choose your subdomain carefully — this is the URL your staff, students, and parents will use to access the portal.
Click Next: Admin Account to proceed.
Step 2: Admin Account
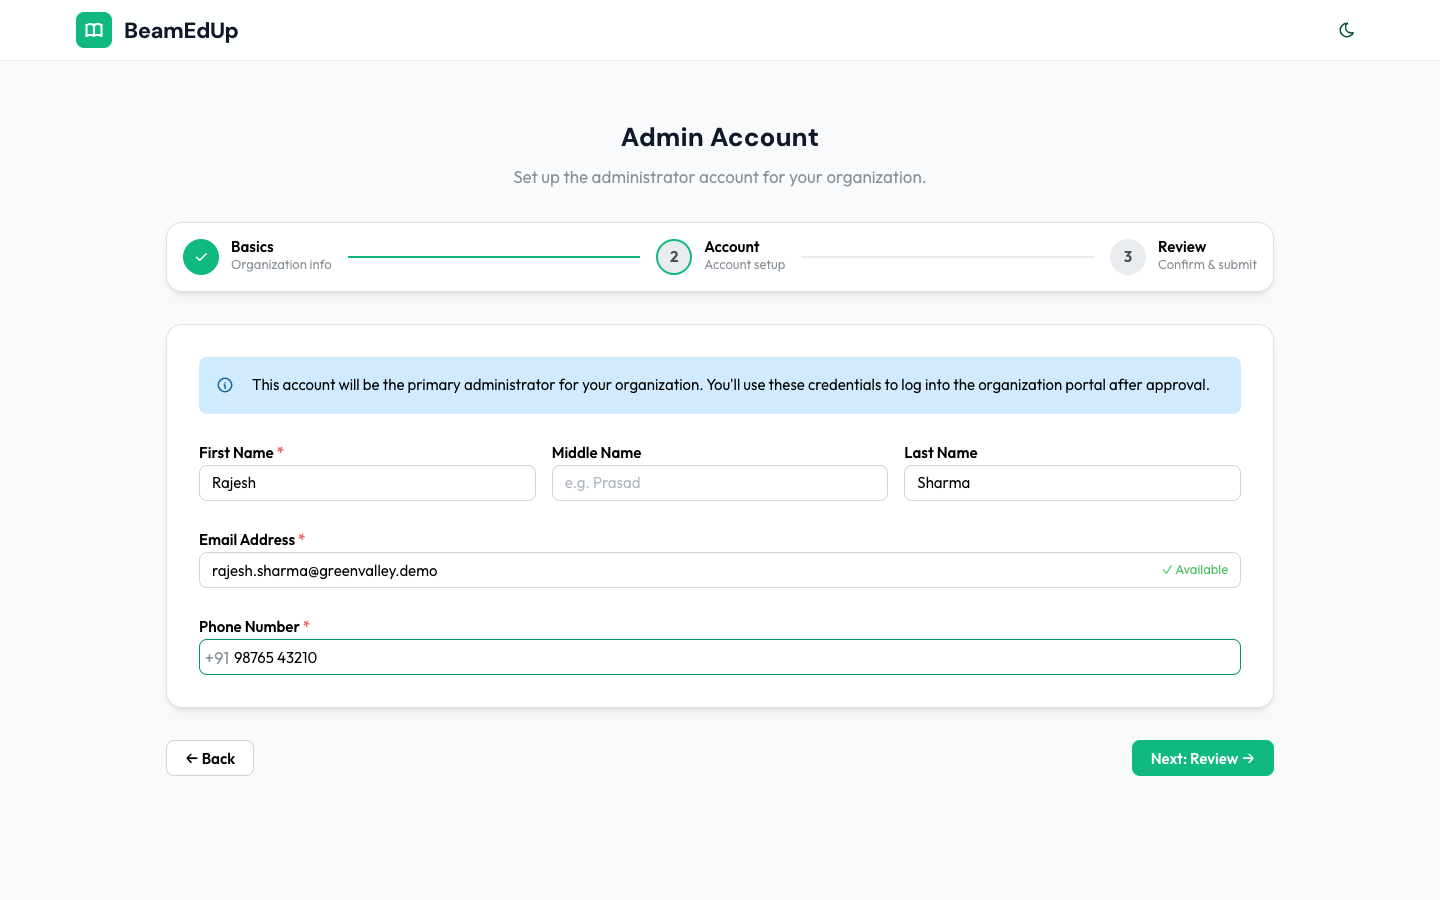
Set up the primary administrator account:
| Field | Required | Description |
|---|---|---|
| First Name | Yes | Admin's first name |
| Middle Name | No | Admin's middle name |
| Last Name | No | Admin's last name |
| Email Address | Yes | Admin's email — used for login and receiving the setup link |
| Phone Number | Yes | Admin's phone number (with country code) |
This account will be the primary administrator for your organization. You'll use these credentials to log into the organization portal after approval.
Click Next: Review to proceed.
Step 3: Review & Submit
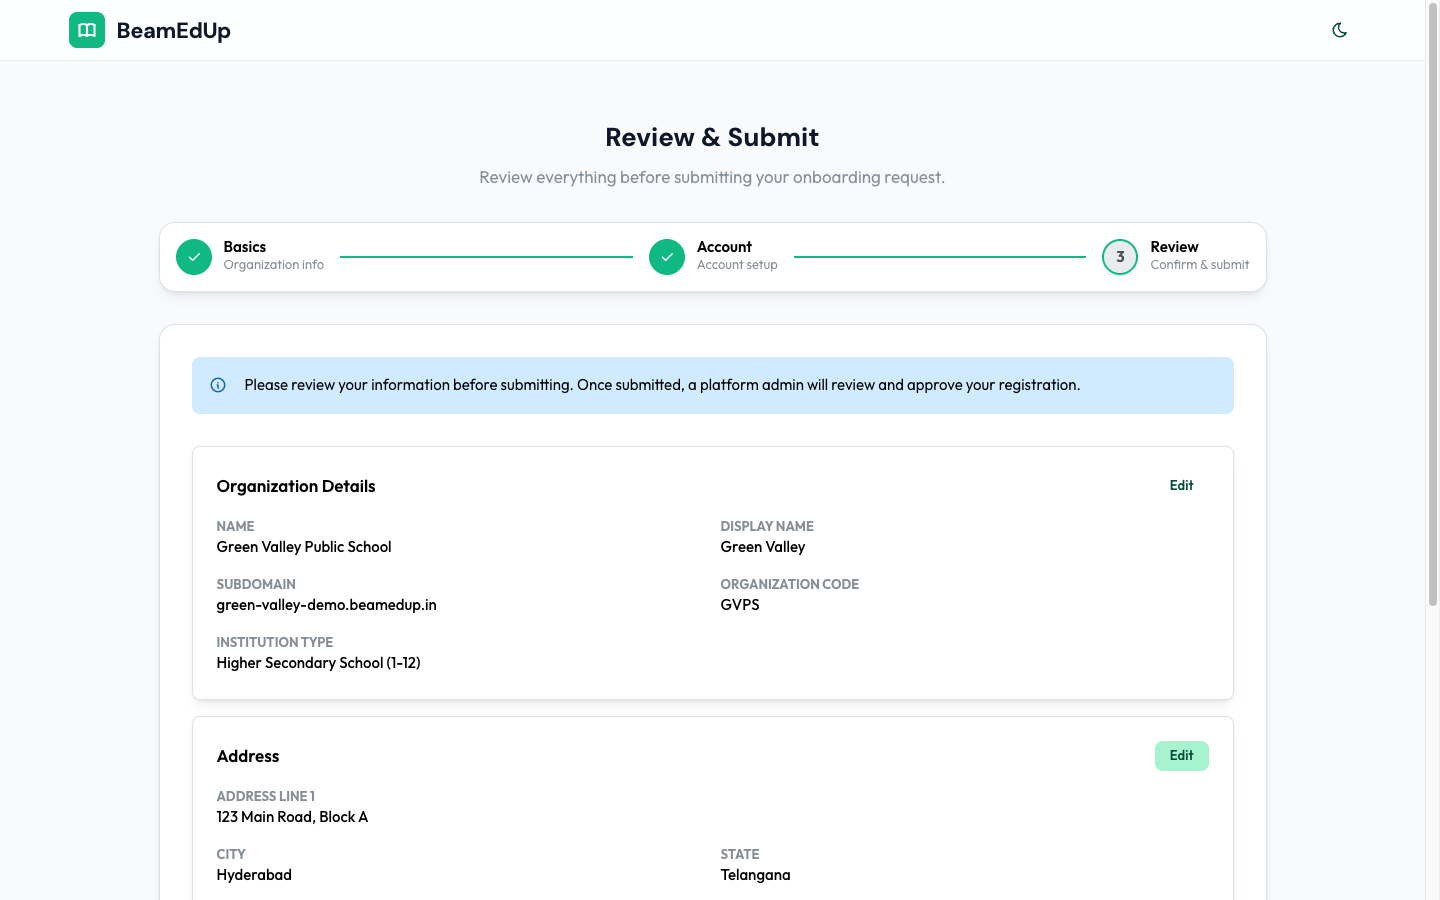
Review all your information before submitting. The review page shows three cards:
- Organization Details — Name, Display Name, Subdomain, Organization Code, Institution Type, Website
- Address — Address Line 1/2, City, State, PIN Code, Country
- Admin Account — Full Name, Email, Phone
Click Edit next to any section to make changes. Once everything looks correct, click Submit Onboarding Request.
After Submission
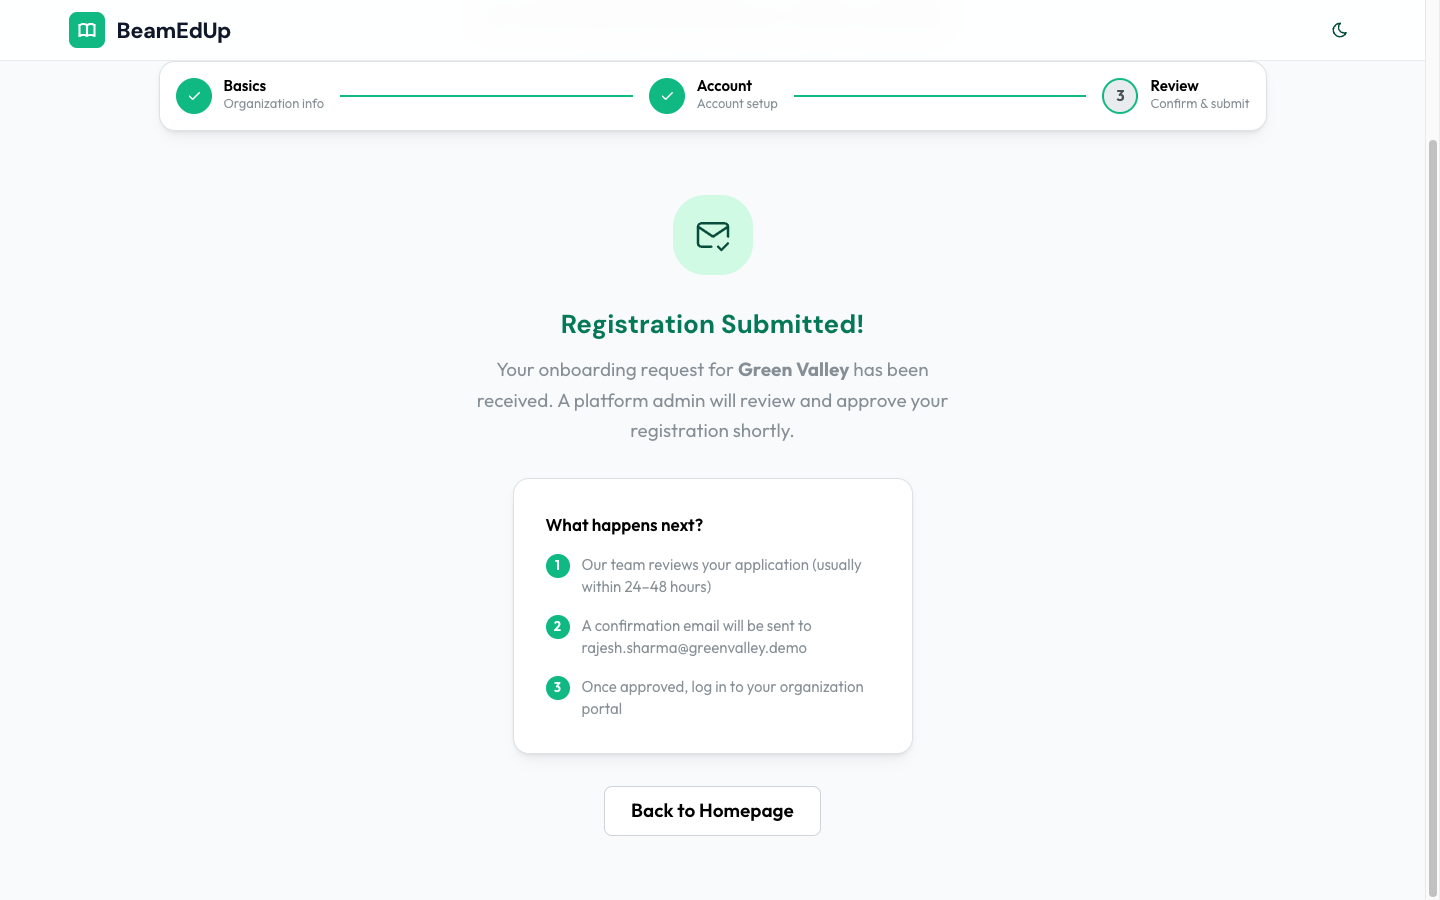
After submitting your registration:
- Your application is reviewed (usually within 24-48 hours)
- A confirmation email is sent to your admin email address
- Once approved, you will receive a setup link via email to complete your account setup
Next Step: After Registration